Homemade Ricotta Cheese: So Easy a Child Could Do It
 If, like me, you’ve always assumed that making your own cheese is too arcane for normal folks, you should find this recipe pleasantly surprising. It turns out that cheese-making, like riding a bicycle, can be hard or easy depending on what you set out to accomplish. Some cheeses must be carefully cultured and patiently aged, requiring both preparation and skill; others can be started and finished in the same morning, even by a distracted parent and three young children.
Homemade ricotta is probably the simplest cheese to make with delicious results. The name “ricotta” literally translates as “re-cooked,” a reference to the fact that ricotta is often made from the whey left over after making other cheeses. But most of the recipes I encountered for the novice began with regular milk, salt, and some sort of curdling agent. Obviously, the fresher your milk, the better the results will be; we are lucky enough to have a local dairy that still delivers fresh milk in glass bottles, so I used their non-homogenized (“cream-top”) whole milk.
I was especially eager to test the results on our resident Italians (the Malpezzi-Price family). Paola and Monica both said that (though it came out a little dry) it tasted more like “real” ricotta to them than the American grocery-store variety does. The flavor even reminded Paola of her father eating fresh ricotta with honey as a snack. Not bad for a first effort!
To make your own fresh ricotta cheese, you’ll need the following basic equipment: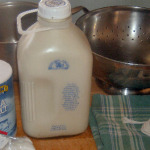
• a 3-quart or larger stainless steel, glass or enamelware saucepan – don’t use aluminum or copper
• a candy thermometer (not absolutely essential, but very helpful)
• a slotted spoon
• a colander
• a clean dishtowel and some string
• a large bowl (optional)
The following three ingredients will yield about a pint of ricotta:
• 1/2 gallon whole milk. You can use lowfat or even skim milk, with varying results. The one thing You cannot use is ultrapasteurized milk, the kind that is sold unrefrigerated in cardboard boxes.
• 1 teaspoon salt.
• 1 teaspoon powdered citric acid. I found citric acid in the bulk section at my local organic market. If you can’t find citric acid locally, you can order it online from cheesemaking supply shops like the New England Cheesemaking Supply company. Or you could use any of a handful of other curdling agents: lemon juice seemed the most popular, followed by rennet (another specialty shop item), buttermilk, and even white vinegar (though the folks who had used vinegar seemed less often happy with their results).
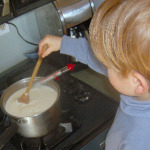 Once you have everything assembled in a clean workspace, begin heating the milk over a moderate flame. You’ll need to stir almost constantly to prevent scorching – a great job for little helpers. Add the salt right away. Dissolve the citric acid in a little water, and add half of that solution right away, too. Reserve the rest of the citric acid solution in case you have trouble getting the milk to curdle. (The lemon juice and buttermilk folks seem to wait until the milk is hot before adding their ingredients.)
If you’re using a candy thermometer, gradually bring the milk up to about 185°F. Without the thermometer, you’ll have to judge by how close it seems to boiling – it should never reach a simmer, but it should start to seem close. (If you’re using lemon juice or buttermilk and haven’t added it yet, now’s the time.) Hold the temperature at that level without boiling until the milk begins to separate. Here’s where the rest of that citric acid solution might be necessary, if the milk just doesn’t want to curdle.
Once it begins to curdle noticeably, remove it from the heat and let it rest for at least 15 minutes. You’ll get a greater yield if you’re patient and wait 20 or 30 minutes. When you’re done waiting, the subtle curds will have grown larger, and be floating in a liquid that is now visibly different from the milk you started with. The liquid is whey, and it’s distinctively more translucent than milk, with a pronounced greenish tinge.
The next step is to separate the curds from the whey, using the dishtowel and colander. Place the colander in the large bowl or sink, rinse the dishtowel in cold water, and line the colander with it. Slowly pour your curds-and-whey mixture into the colander, allowing the whey to run through while the curds collect in the dishtowel. (You’ll recall that Paola found my cheese too dry. Because I had saved the whey, I was able to soften the cheese by mixing some of the whey back in later.)
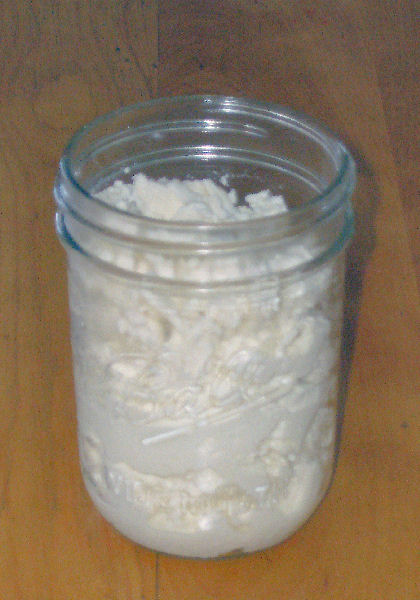
When it’s all in the colander and most of the whey has flowed through, gather the corners of the dishtowel and tie them together, leaving the cheese in a ball. Hang the ball of ricotta (or just leave it in the colander) to drain for around 15 minutes; when that time’s up, it’s ready to eat. What will you make with it? We paired our ricotta with Easy, Fresh Pasta and made a homemade lasagna. If you’re looking for a delicious dessert, you could try Monica’s Ricotta Mousse (look for the recipe next month). Or maybe you’ll just take a cue from Paola’s father, drizzle it with honey and eat it with a spoon!
–Rich Young